How to make a synth head
November 6, 2026

acon
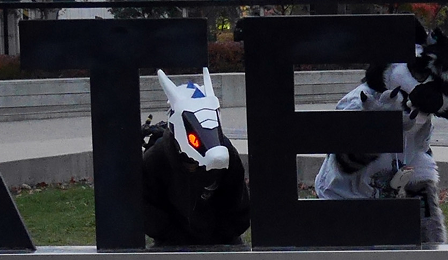
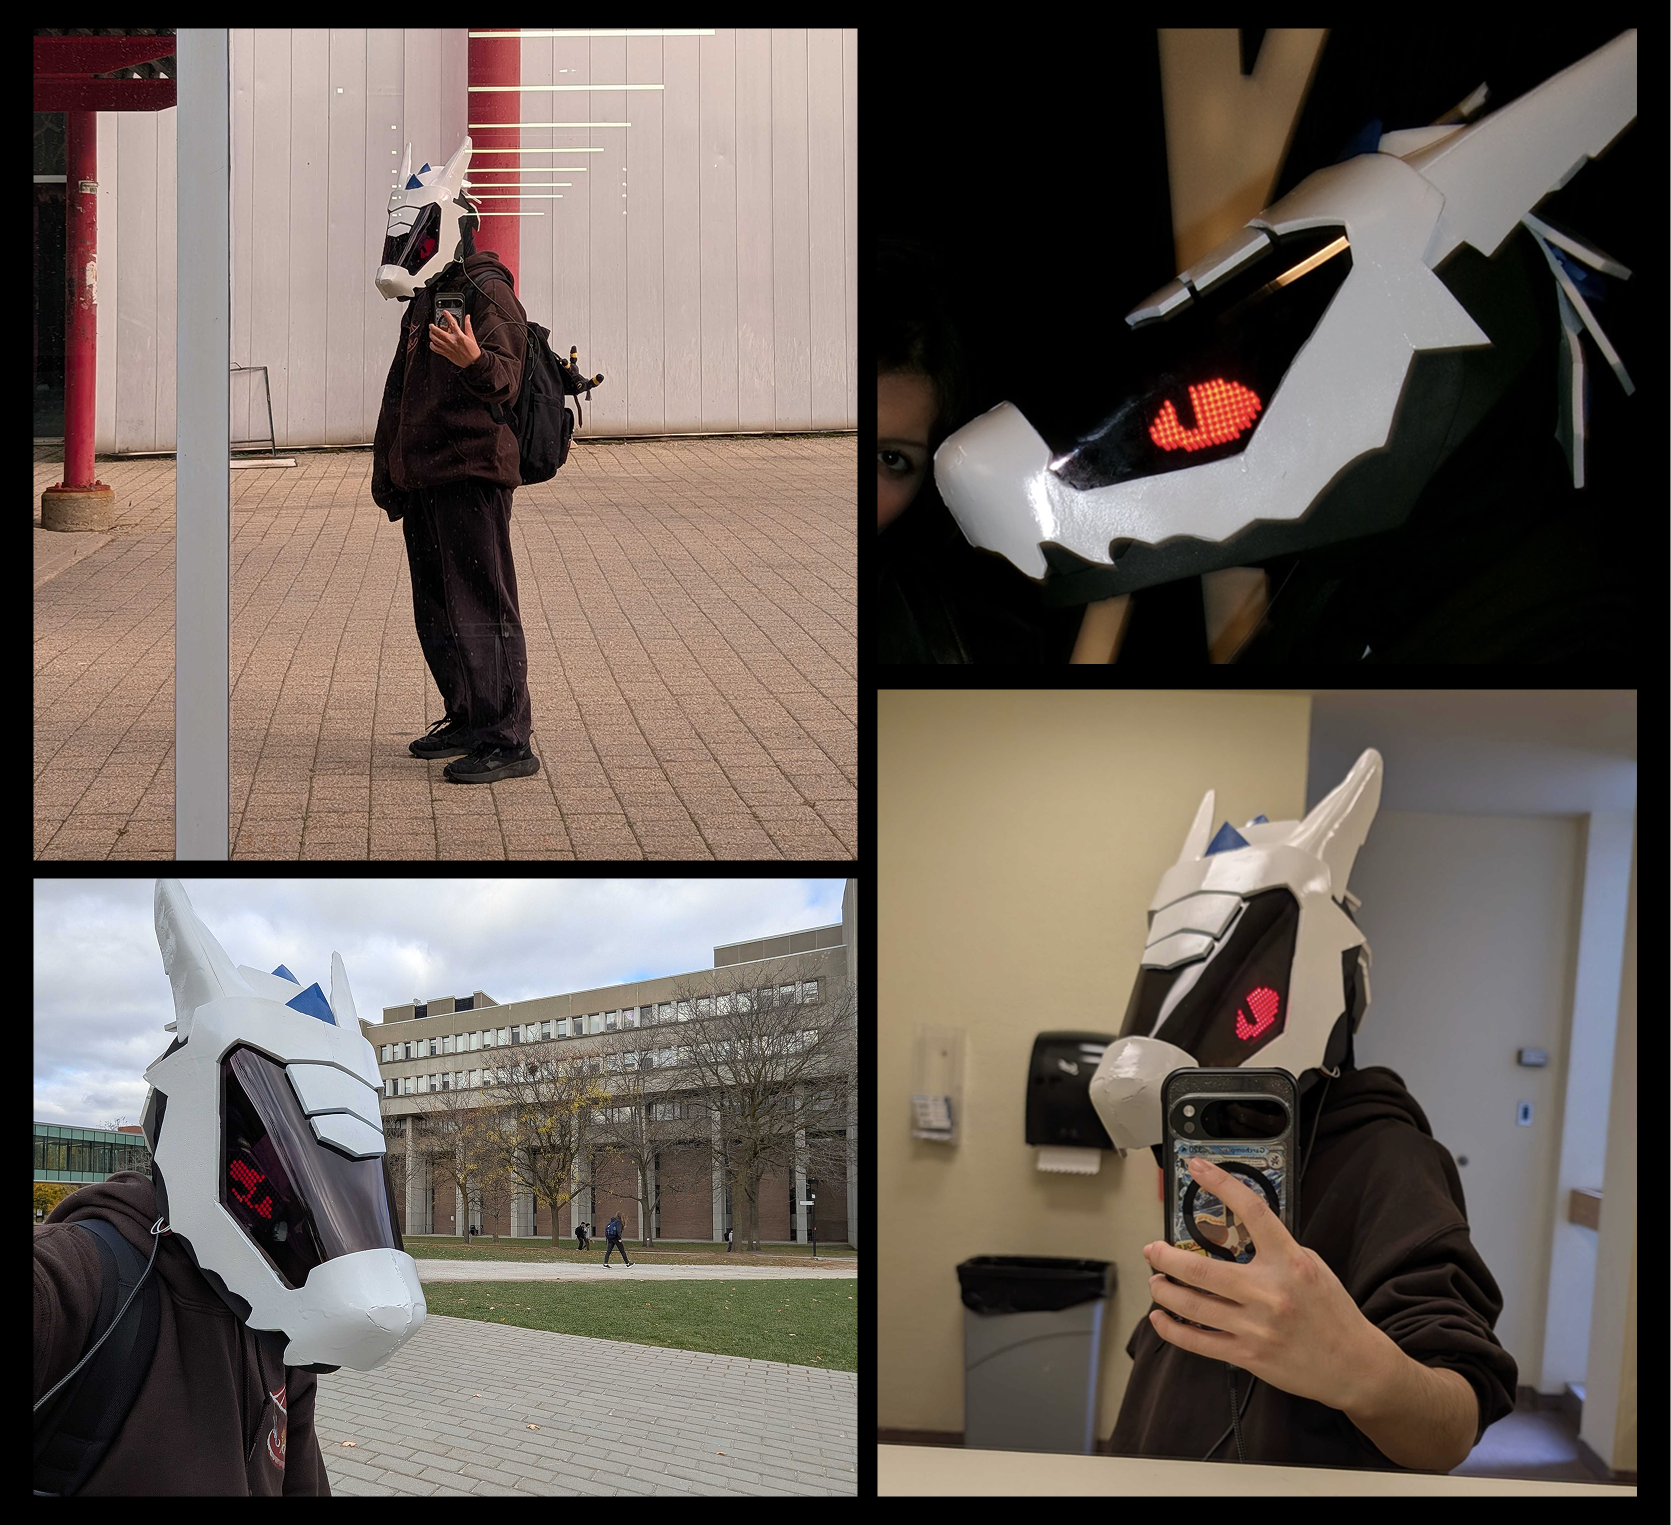
In the two weeks leading up to Halloween, I made a synth head! This post goes over how I made it, as well as recommendations if you're wanting to make one too.
I'm really happy with how mine turned out. There are still parts I want to add, but I think it looks presentable enough to wear, which is what I did all day the Friday before Halloween around Waterloo campus :-)
What I used:
Materials:
- 12x16" 3mm Plexiglass
- Black Idye Poly
- 6mm Eva foam
- 1.5" Elastic band
- MAX7219 LED matricies
- Xiao RP2040 microcontroller
- Jumper wires + right angle header pins
- USB-C cable
- Spray paint
Tools:
- Plexiglass cutter
- Heat gun
- Soldering iron + solder
- Metal bucket
- Plastic bucket
- Hotplate
- Scissors
- Hot glue gun + hot glue sticks
- Painter's tape
- Electrical tape
- Twine
- Thermometer
- Paper towels
Other nice-to-haves:
- Proper ventilation
- Fume extractor (for soldering)
- Wielding gloves
- Latex gloves
- Paper
- Balaclava ski mask
Even though the nice-to-haves are not technically apart of the project, you should definitely get them! It'll save so much time and braincells.
Part 0: why a synth?
Firstly: I thought they looked really cool! It's dragon-shaped but it also has a visor you can see through and has electrical components? Sign me up.
Secondly: unlike protogens, you don't need a vacuum sealer! This was the main block for me creating a techy fursuit head. The bends on a synth visor are all straight, so they're doable with a heat gun, which is pretty cheap in comparison. Also, unlike protogens, they're supposed to be highly modular in lore, so there's no set standard design to follow.
Thirdly: you don't technically need to fur it. This is good, since fur gets really messy and I don't have a space I can reliably work with it. I guess the species is supposed to be more machine than organic, at least on the outside.
Also, have I mentioned they look really cool?
Part 1: the visor
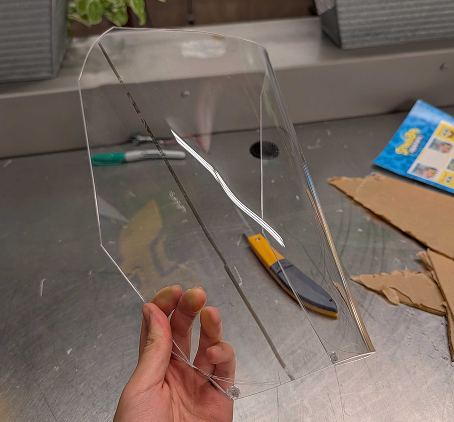
The visor is probably the most important part of the head. It's what you see out of while in costume, and what everything else is built around.
To make the visor, I used a sheet of 12x16" 3mm plexiglass, which is a type of acrylic. I ordered mine off Amazon, and I'd recommend getting a pack of at least 2, since it will probably take multiple tries to get right. If I were to make another head, I'd consider getting 2mm plexi, since 3mm feels a bit too heavy.
For the visor shape, I used the pattern from Raptor's Den! You can download it here.
Trace it onto the plexi and cut it out using the plexiglass cutter. You can leave a bit of space near the edges that are curved ends, as it's easier to cut straight lines - it'll be covered by eva foam later.
I'd recommend watching this video on how to cut plexiglass. Put it on the side of a table and put force on it to get the scored parts off.
After you're done, use a soldering iron to poke a hole in the parts of the visor that are not within the pattern, ie: the curved edge ends! This will be used to hold up the visor with twine when it's getting dyed in the bucket.
Form the visor shape using a heat gun. I put the heat gun on the table and held up the plexi with both hands, putting equal force on both sides. You want an even amount of heat in places where the visor is getting bent. Make sure to not put too much pressure on it before it's hot enough - I accidently cracked a visor this way! Don't only blast heat in a singular location or it'll get goopy.
I did also wear wielding gloves while using the heat gun, but in retrospect, I'm not sure if this was necessary, as the plexi didn't get that hot.
Onto dyeing it :D
My setup was super scuffed and on the budget end, but it worked well. I'd highly recommend watching this video on the entire dyeing process.
You'll need two buckets that are able to fit the entirety of the bent visor. One should be metal, to be heated up on a hotplate, and the other can be anything as it'll be filled with cold water. For the metal bucket, I got a cheap one (~16 USD) from Lowes; I think it's supposed to be used for gardening or painting or something, but it worked fine for this. Make sure both are able to fit the entirety of the bent visor!
You could use a stove instead of a hotplate, but I would not recommend doing this in a kitchen. You could also use a large pot instead of a metal bucket, but you can't use it for food after dyeing it :(
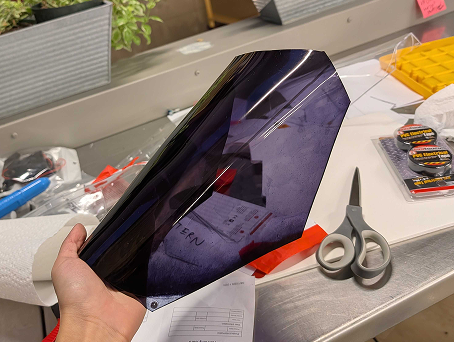
The dye I used is black Idye Poly - it's a special kind of dye used for synthetic fabrics. I only got 1 packet, but if your bucket is any larger than 2 gallons, I'd recommend getting two. Use the color intensifier that comes with the packet!
Fill both buckets with water, then put the metal one on the hotplate. You'll need to wait until the water gets up to at least 60°C. I used an IR thermometer meant for food to check. Put the dye and color intensifier in the bucket and wait until it desolves. Wipe the edges and scope out any solid floating bits with paper towels.
Thread twine through the holes made earlier on the visor. This will be used to hold the visor up so it doesn't touch the edges of the bucket while it's in there.
To dye the visor, put it in the dye bucket for 5 minutes, then dunk it in the cold water bucket to let the dye set in. Repeat this 3-4 times until the visor seems dark enough.
Yay! the hardest part is now done :D
Part 2: eva foam
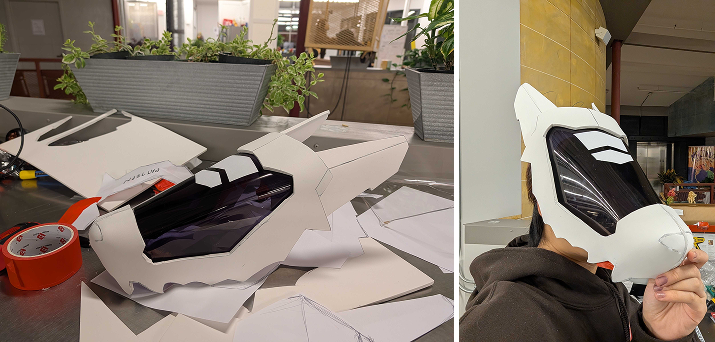
Most of the rest of the head is made with eva foam, which is a type of foam commonly used for cosplay, as it hardens after getting blasted with heat.
To make the pattern for the eva foam, I first cut out pieces of paper and taped it onto the visor. You can also use tape to pattern out the curved edges / to add to the paper! After getting a shape you're happy with, cut it out and trace it onto the foam. Remember it's symmetrical, so you only need to make the pattern for one side, and then flip it.
I started making the pattern for mine before dyeing the visor:
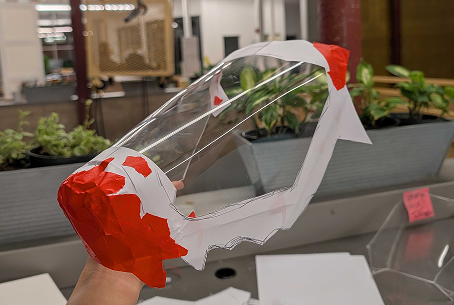
I'd recommend looking at a ton of synth photos online for reference and inspiration!
Tape all the foam parts together onto the visor to check it. Once you're happy with the shape, remove all tape and heat gun the foam pieces into the shape you want them to be in.
To clean up the rough spots near the nose, you could put some foam clay on it. However, I've found that it's hard to get it to smooth out onto the foam, and ended up removing most of it.
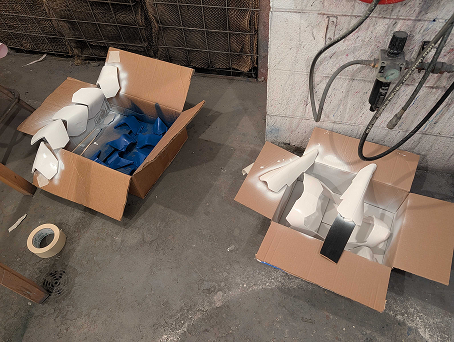
Then, spray paint the pieces! I only had time to do one coat, but I recommend doing multiple to make it smooth. Make sure you have proper ventilation while doing this step.
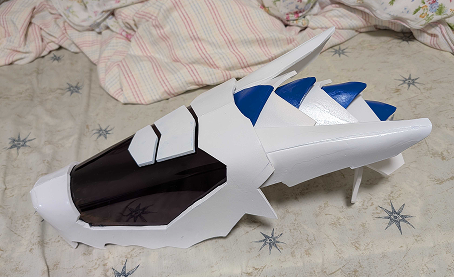
You'll also need a base for the visor to rest on. People usually use a sturdier material for it (ie: 3d printed PLA or worbla) but I just used more eva foam. You'll need to make a top part and a bottom jaw.
I ran 1.5" elastic through the top and sides to hold the base onto my head. Also, put velcro onto the nose and top of the base, and to the bottom of the visor, so that the two parts are detachable at will.
Before gluing the pieces together, tape it together again and put it on your head. It should be able to rest without needing you to hold it up. Make sure it fits!
When you're ready, hot glue everything together. (Don't glue the base to the visor! That'll be put together with velcro so that you can access the electronics easily later.)
Part 3: electronics
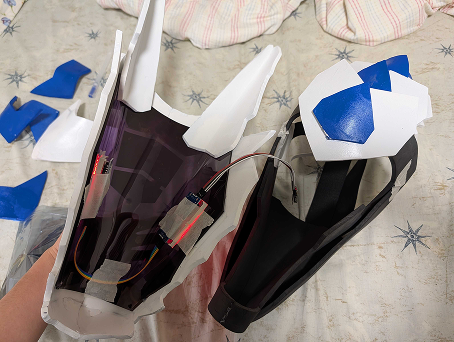
This was my favourite part!
I didn't have much time to order many modules, so the electronics for my head was just the bare minimum - blinking eyes.
I used the MAX7219 dot matrix display modules - you can get a pack of 10 from Amazon for <15 USD. They are only able to display one color, so make sure you get the color you want! There are also other more expensive LED matricies that can display a variance of colors you could get instead.
I daisy-chained 4 MAX7219 displays together, then wired it up to a Xiao RP2040 for the microcontroller. Each eye is made of two of the displays.
For the eye art / blinking animation, I did the art in aseprite, then converted it to bitmap.
You can use the Arduino IDE to write and flash code onto the Xiao.
When you're done, tape it onto the visor. You can use painter's tape first to check if the location looks good, and then secure it with electrical tape. To turn it on, the Xiao can either be connected via USB-C cable to your phone or a power bank.
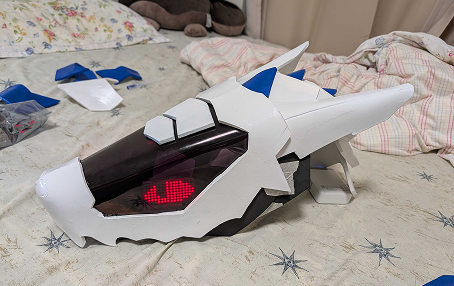
I ended up just connecting it to my phone, which was kept in my pocket.
Lastly: don't forget to get a balaclava ski mask to wear under the synth head, especially if you don't make the neck / inner lining! It'll cover your neck and make it much more comfortable to wear.
Part 4: afterthoughts
When I first ordered the materials for the visor, I had no clue if I would be able to finish this project, let alone in time for Halloween. It's been a wild ride, and I'm so glad I pushed through.
Since I was traveling during this time (this project was started in Vermont, as I was visiting during reading week, and finished in Waterloo!), I bought things when I needed them. A lot of decisions were made on the spot, and I'm sure there are more optimal ways to make a synth head on a budget.
Materials and tools included, this project probably cost somewhere around 200 USD. I didn't have the majority of the tools before making this project, but I now have random things like a heat gun... and wielding gloves...
I don't think any individual part of this project was technically challenging - the hardest part was probably just having the motivation to execute. When I first started the project, I told myself I'd finish it if I could successfully make the visor, which was the huge unknown variable at the time. After two days and probably ~10 hours, the visor was complete. Now I had to finish the rest, because what is a visor without the synth? It also helped that I could internalize Halloween was a strict deadline. I've probably spent around 30-40 hours total on this project.
This video by BPS.space is vaguely what plays in my head every time I'm working on a personal project, and I'd highly recommend giving it a watch, no matter what you're making. The worst thing that can happen to a personal project is to never finish it, so it's okay to cut corners, if that is what it takes to get it done. Don't overscope!!!
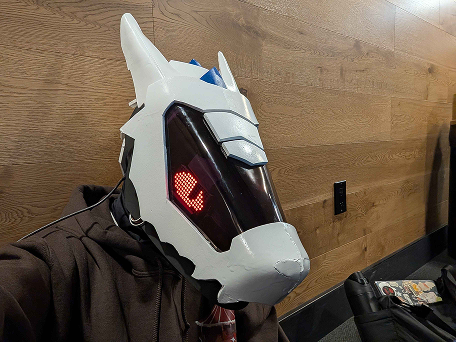
Other things that happened during the making of the synth head:
- skipping 2 midterms to work on it (in my defense, i was a bit sick)
- sneaking into the fine arts spray painting room at UW to spray paint it
- probably many osha violations
Things I'd do if I had more time:
- make the jaw moveable
- fur the bottom jaw + neck, and line the inside
- add an accelerometer sensor, and make eyes change on movement
- add fans on the inside
- perhaps making my own neopixel matrix pcbs for the eyes?
I'll definitely be trying to make another fursuit head in the future. Until next time!